This Laravel tutorial deals with the Installation, Setup and Basic Laravel MVC usage to open a page with intro to the CRUD operations.
Don’t know how to setup a new Laravel project or you are a 20 year old pro who is too pro to touch the basics? This is the right place to be. I’ll keep referencing this tutorial whenever Installation is needed in my other Laravel posts.
It is expected that you are familiar with the basics of windows and linux server administration. If you need more help then please use Google. But I will try to avoid the basics to make sure that the goals are achieved without any fuss.
Now I don’t joke around. As per the tradition of this blog, I will make sure that you achieve this goal with the least effort wasted on figuring out wtf is this blog talking about. Let me know in the comments if you find it helpful. So let’s get started!
The 12345 Steps 🙂 :
- Setup of new project and running the server to make sure it bites.
- Creating a Database (mysql)
- Performing Migration to create schema
- Controller to repeatedly insert and render a View
- Test! and Conclusion
1. Setup and running new project
Lets learn how to install a new Laravel project with running a server on default port 8000.
Before we start, it is important that you should simply follow the official documentation for the latest Laravel Version installation guideline. I don’t want you to look backward when mentioning my blog.
Source: https://laravel.com/docs/5.8/installation
So create a folder in your drive and open the console in it like so:

Now, lets create a project by running the following command in console:
laravel new codeonion_tutorial
This creates a “codeonion_tutorial” folder and will start downloading the assets we need.

After a decade of waiting, the project will be ready. Now let’s make sure that it is running.
- I go into the codeonion_tutorial project by cd codeonion_tutorial
- Start the Server:
php artisan serve
- Visit the IP address as provided by the console output. Mine by default shows http://localhost:8000
- So it works. You can now create a database.
2. Creating a Database (mysql)
Lets learn how to create a database in phpmyadmin for a Laravel project. But first, lets enjoy this breathtaking performance by the star of this blog.

You might be using XAMPP, LAMPP or plain old terminal based mysql server. I don’t care. AS a professional, you must have to know how to create a database. Heck! You must be able to follow this tutorial with using other database engines as well. So help yourself and learn that part as well. Let me know if you want me to make a tutorial about that. Otherwise, just keep following.
I am using Windows and Xampp. Run the Mysql server and open phpmyadmin

Then visit http://localhost/phpmyadmin/

Now, let’s create a database. Press New as shown below:

A Create database page will open which is explained below:

- Write name of your database to be.
- Press Create
- Done! (but also note these sub points)
- It could
- Fail if it violates any rules of database server
- It could also fail if your database is not allowed
- It could also fail if your Hosting service limits you by number of databases you can make
- Now how many bloggers would tell you about these things !! ;D
- It could
3. Performing Migration to create schema
Here, lets learn how to perform migrations and database configuration in Laravel.
Nothing is easy nowadays. You have publishers destroying true game developers and companies and then you have web frameworks made confusing by ignorant bloggers. I am all of them combined. So let’s configure our project database for migrations.
- Our composer installation of the Laravel has already set the .env configuration file in place. But let’s do that manually to exercise the process.

- Go to the terminal/command line and execute the following command

The .env file will be created and we will now configure it for our database. Open the .env file in the root folder of your newly created project and find the following highlighted database configuration

Lets set it to match our database

Migrations
First we have to clean the migration files created by composer. Go to the database/migrations/ folder and delete all files.
Now let’s create a migration file. Execute the following command from the root folder of the project.
php artisan make:migration create_messages_table

Now from the root folder, go to database/migrations/ folder and open the latest file which was created. Migration file that was created for me was:
2019_07_14_162743_create_messages_table.php
It has a timestamp along with the name I designated in the filename.
Open the file and lets add commands to create our “messages” table..
Initially, it will contain up and down functions (which handle what happens when we want the executions to be at up or down state in our database server).

Lets add the following line after the “id” column line in the up() function
$table->string(‘message’);

Lets run the migration using
php artisan migrate

Note that if you screwed up, then you can “undo” the migration using php artisan migrate:rollback but it is not necessary to do now.
At this time, go to phpmyadmin and you will see that our table has been created.

Now, lets make a web page which repeatedly inserts into that table and fetches all and displays into a page. Sweet!
4. Controller to repeatedly insert and render a View
Lets learn how to create a Model, controller, view and route for our Laravel project.
Our database is connected, migrations are up. Now we need to populate the table and then we need to display it on the screen. So lets start without any regular fuss that I am used to deliberately provide to you include this once.
MODEL CREATION
Lets learn how to create a Model for the messages table. This model will be used by the controller.
First, lets create a model by executing this command
php artisan make:model Message
Open the model file at root/app/Message.php and change its content to make sure that it points to the correct table. Add the highlighted line and save it.

Now we can use the model in our controller.
CONTROLLER CREATION
Lets learn how to make a controller for our view. This controller will call out modal to add a random message and fetch all messages.
We need to create a controller. From the root folder, execute this command
php artisan make:controller MessageHandler

This will create a controller file in rootfolder/app/Http/Controllers
Open the root/app/Http/Controllers/MessageHandler.php and change the contents of the controller file as follows:

This controller code:
- Creates a random message
- Saves it to the database in messages table.
- Retrieves all the messages
- Displays them in separate lines
Now, let’s make a route
ROUTE
Lets learn how to make a route for our controller.’s process_and_display action
Open root/routes/web.php and add this to the bottom of it:
Route::get(‘show_message’, ‘MessageHandler@process_and_display’);
We are now done with the MVC!
5. Test! and Conclusion
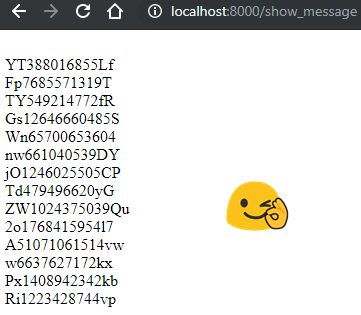
So we have done it all. Lets go to the http://localhost:8000/show_message and see what happens after we refresh the page several times.

You should now review the above steps. Go over the project you created and learn what was done in each step.Read documentation and learn more.
Please let me know in the comments about this post and tell me if there is more I can do. We have now learnt about Installation, Setup and Basic Laravel MVC usage to open a page with intro to the CRUD operations .
android arguments autocomplete autohotkey camera code codeiginter 3 Codeigniter codeigniter 3 command line computer vision controller files focal fossa help helpful hotkey how how to HTML install installation java knoppix laravel learn libraries linux mvc open opencv OpenCV4Android PHP plugin project python Review – Web Design WYSIWYG SDK solution sudo terminal tutorial ubuntu ubuntu 20.04 update
3 responses to “Laravel 5.8 Creating a MVC project with CRUD in 5 steps”
str_random depreciated in Laravel 5.8
Replace with this code:
use Illuminate\Support\Str;
$randomString = Str::random(2) . rand() . Str::random(2);
Also the protected table should be the “Messages” table not the database name.
Other from that all works well, enjoyed reading the blog, thank you 🙂
Thank you very much for contributing your knowledge Jasey.
[…] Next, learn about laravel complete MVC basic guide HERE! […]